Few sounds are as grating as a sudden, loud high-pitched whine from your vacuum cleaner, turning a routine cleaning task into a cacophony of annoyance. This piercing noise isn’t just irritating; it’s your vacuum’s way of telling you something is wrong. Understanding the root cause of this sound is the first step toward restoring peace and powerful suction to your home. This guide will walk you through common culprits behind a high-pitched vacuum noise and provide practical, step-by-step solutions to get your machine running smoothly and quietly again.
Understanding Vacuum Cleaner Noises
Vacuum cleaners, by their very design, are not silent appliances. The powerful motor, rapidly spinning fan, and the air rushing through the system naturally generate a certain level of operational noise. Traditional upright and canister vacuums often have a deeper roar, while cordless stick vacuums are known for a higher-pitched hum due to their fast-spinning, smaller motors. Robot vacuums typically produce a lower, more consistent hum, sometimes increasing in volume with a “Carpet Boost” feature, or a very loud roar during self-emptying cycles, which is completely normal.
However, when your vacuum suddenly develops an unusual high-pitched whine, whistle, or squeal that deviates from its normal operating sounds, it signals a problem. This abnormal noise often indicates that the motor is straining due to restricted airflow or a mechanical issue is present within the unit. Addressing these issues promptly can prevent further damage and extend the lifespan of your appliance.
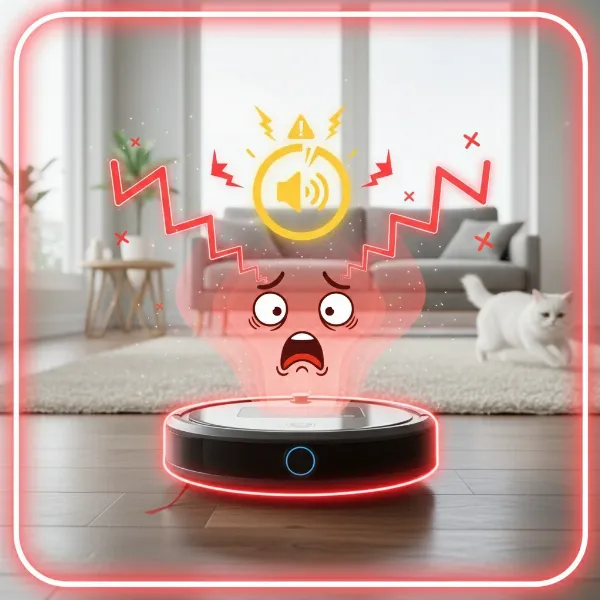 Vacuum cleaner emitting a loud, high-pitched whine indicating a mechanical problem.
Common Causes of High-Pitched Vacuum Noises
A high-pitched noise is almost always a symptom of an airflow blockage, causing the vacuum’s motor to work harder than it should. However, other mechanical issues can also contribute to these irritating sounds.
Clogged Filters
|
Our Picks for the Best Vacuum cleaner in 2026
As an Amazon Associate I earn from qualifying purchases.
|
||
| Num | Product | Action |
|---|---|---|
| 1 | Eureka PowerSpeed NEU181A Upright Vacuum Cleaner For Daily Cleaning for Pet-Owning Households , 5-Height Adjustment-Powerful Suction-Large Dust Cup-Pet Turbo Brush,Suitabe For Carpets & Hard Floors |

|
| 2 | UNINELL HOME Cordless Vacuum Cleaner, 45,000Pa/450W Stick Vacuum Cleaners for Home, 60 Mins Runtime, Self-Standing, Detachable Battery, Anti-Tangle Brush, Lightweight Wireless Vacuum for Pet Hair |
|
| 3 | Cordless Vacuum Cleaner, 550W 45kPa 65Mins Vacuum Cleaners for Home with LED Display, Self-Standing Stick Vacuum with Anti-Tangle Brush, Rechargeable Vacuum Cordless for Pet Hair/Carpet/Floor |
|
| 4 | Bissell CleanView Compact Turbo Upright Vacuum with Quick Release Wand, Full Size Power, Compact Size for Apartments & Dorms, 3437F |
|
| 5 | Shark Upright Vacuum, Navigator Lift-Away Deluxe with Large Dust Cup Capacity, HEPA Filter, Swivel Steering, Upholstery Tool & Crevice Tool, Blue, NV360 |
|
| 6 | Shark NV352 Navigator Lift Away Upright Vacuum, Hepa Filter, Anti-Allergen Technology, Swivel Steering, Ideal for Carpet, Stairs, & Bare Floors, with Wide Upholstery & Crevice Tools, Lavender |
|
| 7 | Eureka NEU10AE5 Powerful Bagless Upright Vacuum Cleaner Carpet and Floor, AirSpeed Ultra-Lightweight Vacuum Cleaner, w/ Replacement Filter, Blue |
|
| 8 | Eureka Lightweight Powerful Upright Vacuum Cleaner for Carpet and Hard Floor, PowerSpeed, New Model,Blue,black/New Model |
|
| 9 | MONSGA Cordless Vacuum Cleaner, 45KPa 400W Stick Vacuum for Home, 50Mins Anti-Tangled Vacuum Cleaner with Charging Dock, Light-weighted Handheld Vacuum for Pet Hair/Carpet/Floor, LED Touch Display,MV3 |
|
| 10 | Bissell CleanView Compact Upright Vacuum, Fits in Dorm Rooms & Apartments, Lightweight with Powerful Suction and Removable Extension Wand, 3508 |
|
Your vacuum’s filters are designed to capture dust, dirt, and allergens, protecting the motor and ensuring clean air is expelled. Over time, these filters, whether they are pre-motor, post-motor, or HEPA, can become caked with fine dust and debris. A clogged filter severely restricts airflow, forcing the motor to strain and leading to a distinctive high-pitched whine. This is one of the most frequent causes of excessive vacuum noise.
Solution: Regularly check and clean or replace your vacuum filters according to the manufacturer’s instructions. Washable filters should be rinsed and air-dried completely before reinstallation. Non-washable filters often require replacement.
Blocked Hoses or Attachments
Obstructions within the vacuum’s hoses, wands, or attachments can create significant airflow blockages. Items like socks, small toys, large debris, or even clumps of pet hair can get lodged, preventing air from flowing freely. This restriction forces the motor to overcompensate, resulting in a loud whistling or high-pitched sound.
Solution: Disconnect all hoses and attachments from the main unit. Visually inspect them for any blockages. Use a broom handle or a wire brush (if safe for the hose material) to dislodge any debris. Ensure all connections are secure when reattaching.
Full Dust Bag or Canister
Much like clogged filters or hoses, a dust bag that is too full or a canister overflowing with debris will impede airflow. When there’s no room for air to pass, the vacuum’s motor struggles to maintain suction, leading to an increased high-pitched noise.
Solution: Empty the dustbin or replace the dust bag regularly, preferably after every use or when it reaches its fill line. This simple step can significantly improve performance and reduce noise.
Tangled Brush Roll
The brush roll (also known as the beater bar) is essential for agitating carpets and dislodging dirt. If hair, strings, threads, or other debris become tightly tangled around the brush roll, it can prevent it from spinning freely. This resistance puts extra strain on the motor and drive belt, often producing a grinding, squeaking, or high-pitched whirring noise.
Solution: Unplug the vacuum and turn it over. Use scissors to carefully cut away any tangled hair or strings from the brush roll. Also, check for any hard objects like coins or pebbles jammed in the brush area. Ensure the brush roll spins freely by hand after cleaning.
Incorrect Height Adjustment
Many upright vacuum cleaners feature a height adjustment setting to accommodate different carpet pile lengths and hard floor surfaces. If the vacuum’s height is set too low for a thick carpet or too high for a bare floor, it can create an improper seal or restrict airflow to the brush roll. This can cause the motor to work harder and generate an unusual high-pitched sound.
Solution: Adjust the height setting to match the surface you are cleaning. Use lower settings for bare floors and delicate carpets, medium for most carpet surfaces, and higher settings for plush or high-pile carpets.
Damaged Seals or Air Leaks
A vacuum cleaner relies on a sealed system to create powerful suction. If any seals along the hose, dustbin, filter compartments, or other connections become damaged, cracked, or loose, air can leak out. This leakage disrupts the airflow, leading to a loss of suction and often a distinct whistling or high-pitched noise as air escapes.
Solution: Carefully inspect all seals, gaskets, and connection points for visible damage or improper fitting. Ensure hoses are firmly attached and dustbin lids are securely closed. While minor issues might be fixed with tape, significant damage may require replacement parts or professional repair.
Motor Issues (Bearings, Fan Blades)
While less common for a DIY fix, internal motor problems can also cause high-pitched noises. Worn or dry motor bearings can lead to a squealing or whirring sound, while damaged fan blades within the motor housing can create a loud, persistent grinding. These issues often point to a more serious mechanical failure.
Solution: If you suspect motor issues and cleaning doesn’t resolve the noise, especially if accompanied by a burning smell or loss of function, it’s best to stop using the vacuum immediately. Do not attempt to disassemble the motor housing yourself, as this can be dangerous and may void your warranty. Contact the manufacturer’s customer support or a professional repair service.
Step-by-Step Troubleshooting Guide
When your vacuum starts emitting a high-pitched noise, follow this systematic approach to diagnose and resolve the problem safely and efficiently.
- Safety First: Always unplug your vacuum cleaner from the power outlet before performing any inspection or maintenance. For cordless models, ensure they are powered off entirely.
- Empty the Dustbin/Bag: Check if the dust bag is full or if the bagless canister needs emptying. A full container is a common cause of reduced airflow and increased noise. Empty or replace as needed.
- Inspect and Clean Filters: Locate all filters (typically pre-motor and post-motor). Remove them and tap them over a trash bin to dislodge fine dust. If they are washable, rinse them under cold water and allow them to air dry completely for at least 24 hours before reinstallation. Replace any damaged or excessively dirty non-washable filters.
- Clear the Brush Roll: Turn the vacuum over and inspect the brush roll. Use scissors to cut away any tangled hair, string, or carpet fibers. Remove any hard objects that might be jammed in the brush. Ensure it rotates freely.
- Check Hoses and Attachments for Blockages: Disconnect the main hose, wand, and any attachments. Visually inspect each section for obstructions. Use a long, blunt object like a broom handle or a straightened wire hanger (with a curved end to prevent scratching) to push through any blockages.
- Verify Height Adjustment: If your vacuum has adjustable height settings, ensure it’s set correctly for the surface you are cleaning. Adjust it if necessary to create an optimal seal.
- Examine for Air Leaks: Carefully inspect all points where air might escape: around the dustbin, filter compartments, and hose connections. Look for cracks, loose fittings, or damaged seals.
- Listen for Motor-Specific Noises: If the high-pitched noise persists after all other checks, try removing the brush roll belt (if applicable) and running the vacuum briefly. If the noise stops, the issue might be with the brush roll assembly. If the noise continues, it could indicate a motor or fan problem.
- When to Call a Professional: If you’ve performed all the above steps and the noise persists, especially if you notice a burning smell, sparks, or a significant loss of function, it’s time to seek professional help. These are critical warning signs of a failing motor or other serious internal damage that require expert repair.
Preventing High-Pitched Noises
Proactive maintenance is the best defense against unusual vacuum noises and extends the life of your appliance.
- Regular Emptying: Empty your vacuum’s dustbin or replace the bag after every use or when it’s two-thirds full to maintain optimal airflow.
- Frequent Filter Cleaning: Clean or replace filters monthly or as recommended by the manufacturer.
- Brush Roll Maintenance: Periodically check and clear the brush roll of tangled hair and debris.
- Hose & Attachment Checks: Occasionally disconnect and inspect hoses and attachments for potential blockages.
- Correct Height Setting: Always use the appropriate height setting for your floor type.
- Genuine Parts: If replacing parts, opt for genuine OEM (Original Equipment Manufacturer) components to ensure proper fit and function, preventing new noises caused by ill-fitting alternatives.
“Consistent maintenance, though seemingly small, is paramount. A clean filter and a clear brush roll aren’t just about suction; they’re about minimizing the strain on your vacuum’s motor, preventing those irritating high-pitched cries for help.” – Admin, vacuumcleanert.com, Vacuum Cleaner Specialist
Conclusion
A high-pitched noise from your vacuum cleaner is a clear indicator that something isn’t right, most often pointing to an airflow blockage. By systematically checking and addressing issues with your dustbin, filters, hoses, brush roll, and height adjustment, you can typically resolve the problem yourself and restore your vacuum’s quiet efficiency. Remember, regular maintenance is key to preventing these issues from recurring. However, if the noise persists and is accompanied by more severe symptoms like a burning smell, it’s crucial to seek professional assistance to ensure safety and proper repair. Don’t let a noisy vacuum disrupt your cleaning routine any longer; take action and enjoy a quieter, cleaner home!
Frequently Asked Questions
Why does my vacuum make a loud noise after turning it off?
If your Vacuum Cleaner continues to make a whooping or high-pitched sound shortly after being turned off, it is often due to residual air movement between the post-motor filters and seals of the machine. Cleaning these filters and checking the integrity of the seals where they sit can help eliminate this post-operation noise.
Can a vacuum cleaner be too loud, even without a specific problem?
While vacuums are inherently loud, their noise levels are measured in decibels (dB). Traditional uprights can reach 75-85 dB, while robot vacuums typically operate between 60-70 dB. If your vacuum has always been excessively loud, it might just be its inherent design or age. However, a sudden increase in loudness usually indicates an issue.
How often should I clean my vacuum filters?
The frequency depends on usage and filter type, but generally, washable filters should be rinsed monthly and air-dried completely. Non-washable filters may need replacement every 6-12 months. Always refer to your vacuum’s user manual for specific recommendations.
Is it safe to use a vacuum that’s making a high-pitched noise?
It is generally not safe to continue using a vacuum making an abnormal high-pitched noise, especially if accompanied by a burning smell or reduced performance. This noise indicates the motor is straining, which can lead to overheating, further damage, or even a fire hazard. It’s best to stop use and troubleshoot the issue immediately.